(added chaos tower and rebirth sections.) Tag: Visual edit |
Tag: Visual edit |
||
| (37 intermediate revisions by the same user not shown) | |||
| Line 1: | Line 1: | ||
| + | [[File:PandaTO logo.png|center]] |
||
| − | PandaTO is a custom server, be sure to read through our [[Customizations]] page and other pages on this wiki and familiarize yourself with them. This guide is intended to help you through the changes and guide you through from levels 1-600. |
||
| + | PandaTO is a custom server, be sure to read through our [[Customizations]] page and other pages on this wiki and familiarize yourself with them. This guide is intended to help you through the changes and guide you through from levels 1-600. |
||
Quest rewards have been enhanced, see [[Enhanced Quests]]. Make sure to check your ingame [[System Mail Rewards|System Mail]] as these have also been revamped. Sell the extra Ears and Tails from the Level 30 mail to Item Girl. This will give you enough galders to buy Skill Cards from your Skill NPC. |
Quest rewards have been enhanced, see [[Enhanced Quests]]. Make sure to check your ingame [[System Mail Rewards|System Mail]] as these have also been revamped. Sell the extra Ears and Tails from the Level 30 mail to Item Girl. This will give you enough galders to buy Skill Cards from your Skill NPC. |
||
| − | Skill NPCs are located in [[Desert Beach|Paradise]], [[Caballa Relics|Azteca]] and [[Megalopolis|Garden of Skill Master]]. |
+ | Skill NPCs are located in [[Desert Beach|Paradise]], [[Caballa Relics|Azteca]] and [[Megalopolis|Garden of Skill Master]]. |
| + | == '''Character Selection''' == |
||
| − | Make sure to collect any [[File:Crystal.gif]] Crystals you find along the way, these are important early game because they are used in the [https://pandato.fandom.com/wiki/Rosemary_%26_Miranda Miranda Watty Exchange] to receive Myshop items such as Flicker Drills. Crystals are a common item when drilling in Desert Beach. |
||
| + | [[File:Gladiator.gif|thumb|79x79px]] |
||
| + | Selecting a character on a new server can be tricky, especially when considering the amount |
||
| + | [[File:Champion.gif|thumb|91x91px]] |
||
| + | [[File:Dark Lord.gif|thumb|81x81px]] |
||
| + | of customization that PandaTO has. We've spent quite a bit of time trying to balance the classes and boost their power. This is something which is actively being worked on and high level community members are regularly consulted on. Lots of people ask what character is the best or that they should start out with. Truthfully, all classes have some level of viability, and once you get to level 900 and can start acquiring [[Rebirth And Avataring|Avatar Skills]], the playing field levels substantially. |
||
| + | Good beginner's characters include [[Buffalo]] (Gladiator), [[Sheep]] (Soul Master), [[Lion]] (Scientist), and [[Dragon]] (Dark Lord). All four of these characters/jobs have a good balance of farming and bossing capabilities (Sheep moreso after level 900 when they can acquire Flaming Fist). Champions, the Bunny Pure path, is considered the best character in the game but lacks a good AoEs for farming. This server lets them learn Inferno Blade, now called Champion's Blade, but is meant to be weak to compensate for their awesome bossing abilities (Flaming Fist/Tetra Punch). They are weaker as a beginner's character until you reach level 900 and can learn powerful AoE abilities through [[Rebirth And Avataring|Avataring]], and if you can get over the hurdle of the slower farming pace early on, it will be very easy afterwards. |
||
| − | == '''Leveling up guide:''' == |
||
| − | Levels 1-400 in PandaTO are intended to be a quick grind compared to other versions of Trickster. You will find it easier thanks to the 8x EXP and TM EXP rates and lowered EXP requirements to level up. The first grind to 400 can be the hardest. Subsequent grinds will be easier thanks to the special booster and sprint provided to your character upon rebirth. This section is intended to help first time players find appropriate grinding spots for all levels. '''Note: Questing is sometimes easier for players starting out in early levels, but will eventually find grinding in Fiesta Zone or Phantom School 1-1 easier. Do later Key Quests for their rewards, not the EXP.''' |
||
| − | * Level 1-25--Episode 0, Chapter 1 story quests in Blooming Cora |
||
| − | * Levels 25-40--Hula Octopus and Grumpy Octopus |
||
| − | * Level 40-80--Southeast Forest/Path to Oops Wharf |
||
| − | * Levels 80-130--Path to Black Swamp/Snow Hill 1-Merry Christmas. |
||
| − | * Level 130--3rd Job Advancement Quests |
||
| − | * Level 130-400-- [https://pandato.fandom.com/wiki/Fiesta_Zones Fiesta Zone] or Phantom School Room 1-1. |
||
| − | * Alternate: Level 260-400-- Tapasco Volcano Mine Party Quest |
||
| − | == ''' |
+ | == '''Leveling up guide''' == |
| + | Levels 1-400 in PandaTO are intended to be a quick grind compared to other versions of Trickster. You will find it easier thanks to the 8x EXP and TM EXP rates and lowered EXP requirements to level up. The first grind to 400 can be the hardest. Subsequent grinds will be easier thanks to the special booster and sprint provided to your character upon rebirth. This section is intended to help first time players find appropriate grinding spots for all levels. '''Note: Questing is sometimes easier for players starting out in early levels, but will eventually find grinding in Phantom School Room 1-2 or doing the Tapasco Volcano Mine Party Quest easier.''' |
||
| + | * Level 1-30--Episode 0, Chapter 1 story quests in Blooming Cora |
||
| + | * Levels 30-40--Hula Octopus and Grumpy Octopus, Desert Beach quests |
||
| + | * Levels 40-60--Caballa Relics Field 4. |
||
| + | * Level 60- [[2nd Job]] Advancement Quest |
||
| + | * Level 60-100--Phantom School Room 1-4 |
||
| + | * Levels 100-140--Path to Black Swamp/Snow Hill 1-Merry Christmas. |
||
| + | * Level 140--[https://pandato.fandom.com/wiki/3rd_Job 3rd Job Advancement Quests] (You will receive a Ticket of the Valiant in the [[System Mail Rewards]] at level 140) |
||
| + | * Level 130-400-- Phantom School Room 1-2. |
||
| + | * Alternate: Level 260-400-- Tapasco Volcano Mine Party Quest. |
||
| + | |||
| + | == '''Helpful Exchanges''' == |
||
| + | There are a few helpful exchange NPCs throughout the game to help you get essential items. Make sure to collect any [[File:Crystal.gif]] [[Crystal]] you find along the way, these are important early game because they are used in the [https://pandato.fandom.com/wiki/Rosemary_%26_Miranda Miranda Watty Exchange] to receive Myshop items such as Flicker Drills. Crystals are a common item when drilling in Coral Beach and Desert Beach fields. Also see the [https://pandato.fandom.com/wiki/Pet_Trainer_Shara_Exchange Pet Trainer Shara exchanges] for equips as you get closer to level 400. GM Slave is another useful exchange, see that exchange list [https://pandato.fandom.com/wiki/GM_Slave's_Item_Exchange here.] |
||
| + | |||
| + | == '''Job Advancement''' == |
||
| + | Job Advancement is an essential part of any player's experience in Trickster. On PandaTO, the job advancement quests work the same, see [[2nd Job]] and [[3rd Job]] for the quest's requirements and order. |
||
| + | |||
| + | Each class has two options: a pure path and a hybrid path ([[Dragon]] even has three due to its light/dark spells). The Pure path job lets you learn skills exclusive to that class (although you can still learn them as [[Rebirth And Avataring|Avatar skills]]) and the Hybrid path lets you learn skills your type's counterpart's 2nd job learns. For example, a [[Buffalo]] advancing to Gladiator (Pure) will let them have access to a whole new set of skills reserved for Gladiators, while advancing to Mercenary (Hybrid) will let them learn [[Bunny|Bunny's]] 2nd job skills. |
||
| + | |||
| + | Many players ask what [[3rd Job]] they should advance to. Typically on PandaTO, people choose the pure path due to the availability of [[Rebirth And Avataring|Avatar skills]]. There aren't too many classes where the hybrid path is better, since almost every character has character-defining skills in their pure path option. The only exception to this may be if you're playing a gunner [[Fox]], you would want to advance to Hunter Lord (Hybrid) to learn gun skills. |
||
| + | |||
| + | == '''Farming Galders''' == |
||
Farming galders is the main way to measure progression in PandaTO, and is incredibly important when working towards [https://pandato.fandom.com/wiki/Rebirth_And_Avataring rebirths]. All the methods on how to farm Galders can be found on this page: [[Galder Farming]] |
Farming galders is the main way to measure progression in PandaTO, and is incredibly important when working towards [https://pandato.fandom.com/wiki/Rebirth_And_Avataring rebirths]. All the methods on how to farm Galders can be found on this page: [[Galder Farming]] |
||
| − | == ''' |
+ | == '''Boss Hunting''' == |
| + | [[File:Tutankhamen.gif|thumb|121x121px]] |
||
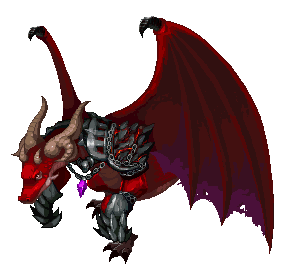
| + | [[File:Spicy Dragon (new).gif|thumb|220x220px]] |
||
| + | In PandaTO, [[Classic Boss Rotation|classic boss monsters]] roam the fields instead of hiding in dungeons. This, combined with a 4x chance to get a boss unique, means that their equipment is available to players who want it. These equips can make a player's grind to level 400 so much easier. Not all bosses are in the game at once, they rotate on a weekly/biweekly schedule. Check #trickster-devlog and look at the recent patches to find out what the newest rotation is. Typically, this is where you will find each boss: |
||
| + | * Tutankhamen: Desert Beach |
||
| + | * Tombeth: Caballa Relics |
||
| + | * Captain Skull: Mermaid Palace |
||
| + | * Pirate King Karan: Mermaid Palace |
||
| + | * Count Blood: Rose Garden |
||
| + | * Tenter Lion: Rose Garden |
||
| + | * Queen Odinea: Snow Hill |
||
| + | * Soki: Snow Hill |
||
| + | * Spicy Dragon: Tapasco Volcano |
||
| + | As you can see, bosses which rotate replace another boss in that respective region. Captain Skull and Pirate King Karan both inhabit Mermaid Palace, but never at a same time. Count Blood and Tenter Lion both roam around the fields of Rose Garden, but never at the same time. |
||
| + | |||
| + | Another one of PandaTO's unique features is the monthly boss hunting event. At the beginning of every month, boss seals will be reset and players will have the opportunity to race to the top of the leader boards and claim the top spots. The top five players with the most seals in any boss monster will receive a prize. These range from donation money prizes to PandaTO Coupon Ds. The latest prize list can be found on Discord under #announcements, and the rankings can be found [[pandato.co/rank|here.]] |
||
| + | |||
| + | == '''Chaos Tower''' == |
||
| + | [[File:Chaos Tower.gif|thumb|192x192px]] |
||
PandaTO's Chaos Tower is accessed through Don Guivanni in Coral Town - Blooming Cora. This is where you will can farm for PandaTO exchange coupons used for obtaining powerful equipment. Find more information [https://pandato.fandom.com/wiki/Chaos_Tower here]. |
PandaTO's Chaos Tower is accessed through Don Guivanni in Coral Town - Blooming Cora. This is where you will can farm for PandaTO exchange coupons used for obtaining powerful equipment. Find more information [https://pandato.fandom.com/wiki/Chaos_Tower here]. |
||
| − | == ''' |
+ | == '''Compound Stones, Drills, and Refine items''' == |
| + | [[File:Alchemist Nate.png|thumb|231x231px]] |
||
| + | Cash versions of these items were extremely valuable in past versions of Trickster, but are given for free to players on PandaTO. |
||
| + | * Compound Stones |
||
| + | ** Level 50-245 Magic Compounding Stones can be drilled in various maps of the island, while level 260-305 can be received from doing Monster Quests in Tapasco Volcano and Abyss and exchanging the tickets received with Mint in that area (for Abyss, see the Mint in Aquarius Shop). Stones level 320 and 335 are received from bags dropped by Poppuri Dungeon Monsters. There are no stones in-game between 335 and 395. For more information, see [[Magic Stones]]. For level 395 and 900 stones, see [[Star Gazer Stella's Exchange]]. |
||
| + | * Drills: |
||
| + | ** Flicker Drill can be found in-game from [[Rosemary & Miranda|Miranda Watty's Exchange]] in Megalopolis Square in exchange for 1x Crystals and 500k Galders. Other MyShop drills can be found on our [[pandato.co|website]]. See more information on the [[Drills]] page. The best drills are Flicker Drill and Bat Drill, due to the increased TM experience your character gets from successfully drilling up an item when using one of those two. |
||
| + | * Refine items: |
||
| + | ** The ores in-game and the % rates on refines are the same as other servers. While this server does not offer Refine % increasing fortune cards, we offer refine-enhancing items in the [[Refinement Event Box]] dropped by all [[Classic Boss Rotation|classic bosses]] except Captain Skull and Spicy Dragon. We also offer a unique refine enhancement item, [[Anvil Stone]] which increases the chance for a successful refine by 50%. These can be received from [[Enhanced Quests]] and [[Refinement Event Box]]. |
||
| + | |||
| + | == '''Equipment''' == |
||
| + | Due to the abnormal level curve in PandaTO, many pieces of equipment that players know are good are not usable for a majority of the game. This guide is intended to help players learn what equips they should try to get. See a video guide presented by Moderator Holo(Alekx) [https://youtu.be/cyv2P3t7MzA here.] |
||
* Levels 1-299: |
* Levels 1-299: |
||
| − | ** Use whatever the best equipment you can get your hands on for your particular level, whether it's the [https://pandato.fandom.com/wiki/Spire_Set requiem spire set] (obtained via [https://pandato.fandom.com/wiki/System_Mail_Rewards system mail rewards]), boss uniques, or a powerful phantom unique picked up in the Fiesta Zone or Phantom School 1-1. These levels go by quickly, so do not worry about it. As long as you get good enough equipment to kill mobs in Fiesta Zone and Phantom School, it's good enough. |
+ | ** Use whatever the best equipment you can get your hands on for your particular level, whether it's the [https://pandato.fandom.com/wiki/Spire_Set requiem spire set] (obtained via [https://pandato.fandom.com/wiki/System_Mail_Rewards system mail rewards]), boss uniques, or a powerful phantom unique picked up in the Fiesta Zone or Phantom School 1-1. These levels go by quickly, so do not worry about it. As long as you get good enough equipment to kill mobs in Fiesta Zone and Phantom School, it's good enough. For additional stats, go to [[Rosemary & Miranda|Rosemary]] in Paradise, Megalopolis, or Carbigal Shop to exchange for head accessories (level 70/150), the [[PandaTO Cape]], and [[Pandro]]/[[Pandro V2]]. |
| + | {| style="border-collapse:collapse; width: 100%; text-align: center;" border="0" |
||
| + | ! colspan="9" style="background-color: #505050; color: #ffffff; font-size: x-large; padding: 15px;" |Requiem Spire Set |
||
| + | |- |
||
| + | | style="padding: 15px; width: 20%" | [[File:Requiem Circlet.gif]] |
||
| + | | style="padding: 15px; width: 20%" | [[File:Requiem Shield.gif]] |
||
| + | | style="padding: 15px; width: 20%" | [[File:Immaterial Sword.gif]] |
||
| + | | style="padding: 15px; width: 20%" | [[File:Spire Gun.gif]] |
||
| + | | style="padding: 15px; width: 20%" | [[File:Spirit Spire Ring.gif]] |
||
| + | |- |
||
| + | ! [[Spire Circlet]] |
||
| + | ! [[Requiem Spire Shield]] |
||
| + | ! [[Immaterial Spire Sword]] |
||
| + | ! [[Spire Gun]] |
||
| + | ! [[Spirit Spire Ring]] |
||
| + | |} |
||
| + | {| style="border-collapse:collapse; width: 100%; text-align: center;" border="0" |
||
| + | ! colspan="9" style="background-color: #505050; color: #ffffff; font-size: x-large; padding: 15px;" |Custom PandaTO Low Level Equipment |
||
| + | |- |
||
| + | | style="padding: 15px; width: 33%" | [[File:Pandro.gif]] |
||
| + | | style="padding: 15px; width: 33%" | [[File:Pandro V2.gif]] |
||
| + | | style="padding: 15px; width: 33%" | [[File:PandaTO Cape.gif]] |
||
| + | |- |
||
| + | ! [[Pandro]] |
||
| + | ! [[Pandro V2]] |
||
| + | ! [[PandaTO Cape]] |
||
| + | |} |
||
* Level 300--The Draconic Set: |
* Level 300--The Draconic Set: |
||
| − | ** Work on getting the Draconic Set, Spicy Dragon's unique equipment, at level 300, this will help your grind if you were struggling before this. Weapons and hats are extremely common, often players will give it to you if they have spares but can be easily and cheaply purchased from other players. Shields and accessories are more rare, but not overly expensive to purchase from other players. |
+ | ** Work on getting the Draconic Set, Spicy Dragon's unique equipment, at level 300, this will help your grind if you were struggling before this. Open from [[Draconic Box]]. Weapons and hats are extremely common, often players will give it to you if they have spares but can be easily and cheaply purchased from other players. Shields and accessories are more rare, but not overly expensive to purchase from other players. If you easily hit level 360 without acquiring these equips, skip them and go straight to the Sentinel Equips. |
| + | {| style="border-collapse:collapse; width: 100%; text-align: center;" border="0" |
||
| + | ! colspan="9" style="background-color: #505050; color: #ffffff; font-size: x-large; padding: 15px;" | Draconic Set |
||
| + | |- |
||
| + | | style="padding: 15px; width: 20%" | [[File:Draconic Sword.gif]] |
||
| + | | style="padding: 15px; width: 20%" | [[File:Draconic Staff.gif]] |
||
| + | | style="padding: 15px; width: 20%" | [[File:Draconic Bowgun.gif]] |
||
| + | | style="padding: 15px; width: 20%" | [[File:Draconic Dagger.gif]] |
||
| + | | style="padding: 15px; width: 20%" | [[File:Draconic Circlet.gif]] |
||
| + | |- |
||
| + | ! [[Draconic Sword]] |
||
| + | ! [[Draconic Staff]] |
||
| + | ! [[Draconic Bowgun]] |
||
| + | ! [[Draconic Dagger]] |
||
| + | ! [[Draconic Circlet]] |
||
| + | |} |
||
| + | {| style="border-collapse: collapse; text-align:center;" width="100%" cellspacing="0" cellpadding="5" border="0" |
||
| + | | style="padding: 15px; width: 50%" | [[File:Draconic Shield.gif]] |
||
| + | | style="padding: 15px; width: 50%" | [[File:Draconic Restraint Pendant.gif]] |
||
| + | |- |
||
| + | ! [[Draconic Shield]] |
||
| + | ! [[Draconic Restraint Pendant]] |
||
| + | |} |
||
* Level 320--Masks: |
* Level 320--Masks: |
||
| − | ** Powerful masks can be obtained from the upper Pet Trainer Shara in Coral Town-Blooming Cora in exchange for 30x [https://pandato.fandom.com/wiki/PandaTO_Coupon_A Panda Coupon A]'s and [https://pandato.fandom.com/wiki/PandaTO_Coupon_B Panda Coupon B]'s obtained in [https://pandato.fandom.com/wiki/Chaos_Tower Chaos Tower] or from [https://pandato.fandom.com/wiki/Regional_Quests Key Quests]. These masks can be refined for MD or DP. |
+ | ** Powerful masks can be obtained from the upper [https://pandato.fandom.com/wiki/Pet_Trainer_Shara_Exchange Pet Trainer Shara] in Coral Town-Blooming Cora in exchange for 30x [https://pandato.fandom.com/wiki/PandaTO_Coupon_A Panda Coupon A]'s and [https://pandato.fandom.com/wiki/PandaTO_Coupon_B Panda Coupon B]'s obtained in [https://pandato.fandom.com/wiki/Chaos_Tower Chaos Tower] or from [https://pandato.fandom.com/wiki/Regional_Quests Key Quests]. These masks can be refined for MD or DP. |
*** Tenter Lion Mask--For Power type users. |
*** Tenter Lion Mask--For Power type users. |
||
*** Noble Monocle--For Magic type users. |
*** Noble Monocle--For Magic type users. |
||
*** XT Goggles--For Sense type users. |
*** XT Goggles--For Sense type users. |
||
*** Jelly Fish Goggles--For Charm type users. |
*** Jelly Fish Goggles--For Charm type users. |
||
| + | |||
* Level 330---Character Sets and Head Equipment: |
* Level 330---Character Sets and Head Equipment: |
||
| − | ** Character set boxes can be obtained from the upper Pet Trainer Shara in Coral Town-Blooming Cora in exchange for 2x |
+ | ** Character set boxes can be obtained from the upper [https://pandato.fandom.com/wiki/Pet_Trainer_Shara_Exchange Pet Trainer Shara] in Coral Town-Blooming Cora in exchange for 2x [[PandaTO Coupon A]]. |
| − | ** Head equipment is received from the lower Pet Trainer Shara in Coral Town-Blooming Cora for 30x |
+ | ** Head equipment is received from the lower Pet Trainer Shara in Coral Town-Blooming Cora for 30x [[PandaTO Coupon B]] and 30x [https://pandato.fandom.com/wiki/PandaTO_Coupon_C PandaTO Coupon C]. These pieces are refined for DP. |
*** Briar Rose--For Power type users. |
*** Briar Rose--For Power type users. |
||
*** Sweet Hibiscus--For Magic type users. |
*** Sweet Hibiscus--For Magic type users. |
||
*** Sunshine Daisy--For Sense type users. |
*** Sunshine Daisy--For Sense type users. |
||
*** Buttery Tulip--For Charm type users. |
*** Buttery Tulip--For Charm type users. |
||
| + | |||
* Level 360--[https://pandato.fandom.com/wiki/Sentinel_Uniques The Sentinel Sets]: |
* Level 360--[https://pandato.fandom.com/wiki/Sentinel_Uniques The Sentinel Sets]: |
||
| − | ** At level 360, players can wear Sentinel Equipment. These sets are intended to give players a large boost in damage, but sacrifice durability, giving little HP and no DP. These sets can help you get through the early stages of the game and defeat [https://pandato.fandom.com/wiki/Sentinels#Requiem_Apocrypha Requiem Apocrypha]. |
+ | ** At level 360, players can wear Sentinel Equipment. These sets are intended to give players a large boost in damage, but sacrifice durability, giving little HP and no DP. These sets can help you get through the early stages of the game and defeat [https://pandato.fandom.com/wiki/Sentinels#Requiem_Apocrypha Requiem Apocrypha]. There are five sentinel sets, meant for each class and type of character: |
| + | * Fallen Watcher Set: Meant for Magic Types, consists of a staff, shield, and hat. Pieces refine for MA. |
||
| − | *** There are five sentinel sets, meant for each class and type of character: |
||
| + | {| style="border-collapse:collapse; width: 100%; text-align: center;" border="0" |
||
| − | **** [https://pandato.fandom.com/wiki/Category:Fallen_Watcher_Set The Fallen Watcher Set] |
||
| + | ! colspan="3" style="background-color: #505050; color: #ffffff; font-size: x-large; padding: 15px;" | Fallen Watcher Set |
||
| − | ***** Meant for Magic Types, consists of a staff, shield, and hat. Pieces refine for MA. |
||
| + | |- |
||
| − | **** [https://pandato.fandom.com/wiki/Category:Solar_Set The Solar Set] |
||
| + | | style="padding: 15px; width: 33%" | [[File:Fallen Watcher Helm.gif]] |
||
| − | ***** Meant for Charm types, consists of a sword, shield, and hat. Pieces refine for HV. |
||
| + | | style="padding: 15px; width: 33%" | [[File:Fallen Watcher Shield.gif]] |
||
| − | **** [https://pandato.fandom.com/wiki/Category:Light_Set The Light Set] |
||
| + | | style="padding: 15px; width: 33%" | [[File:Fallen Watcher Staff.gif]] |
||
| − | ***** Meant for Foxes and Cyber Hunters, consists of a dagger, shield, and hat. Pieces refine for DA. |
||
| + | |- |
||
| − | **** [https://pandato.fandom.com/wiki/Category:Shining_Crystal_Set The Shining Crystal Set] |
||
| + | ! [[Fallen Watcher Helm|Fallen Watcher Helm]] |
||
| − | ***** Meant for Power types, consists of a sword, shield, and hat. Pieces refine for AP. |
||
| + | ! [[Fallen Watcher Shield]] |
||
| − | **** The Tsunami Set |
||
| + | ! [[Fallen Watcher Staff]] |
||
| − | ***** Meant for Lions and Hunter Lords, consists of a [https://pandato.fandom.com/wiki/Tsunami_Rifle gun], [https://pandato.fandom.com/wiki/Tsunami_Helmet hat], and [https://pandato.fandom.com/wiki/Tsunami_Cape cape]. Gun refines for Gun AP. |
||
| + | |} |
||
| + | * Solar Set: Meant for Charm types, consists of a sword, shield, and hat. Pieces refine for HV. |
||
| + | {| style="border-collapse:collapse; width: 100%; text-align: center;" border="0" |
||
| + | ! colspan="3" style="background-color: #505050; color: #ffffff; font-size: x-large; padding: 15px;" | Solar Set |
||
| + | |- |
||
| + | | style="padding: 15px; width: 33%" | [[File:Solar Helmet.gif]] |
||
| + | | style="padding: 15px; width: 33%" | [[File:Solar Shield.gif]] |
||
| + | | style="padding: 15px; width: 33%" | [[File:Solar Sword.gif]] |
||
| + | |- |
||
| + | ! [[Solar Helmet]] |
||
| + | ! [[Solar Shield]] |
||
| + | ! [[Solar Sword]] |
||
| + | |} |
||
| + | * Light Set: Meant for Foxes and Cyber Hunters, consists of a dagger, shield, and hat. Pieces refine for DA. |
||
| + | {| style="border-collapse:collapse; width: 100%; text-align: center;" border="0" |
||
| + | ! colspan="3" style="background-color: #505050; color: #ffffff; font-size: x-large; padding: 15px;" | Light Set |
||
| + | |- |
||
| + | | style="padding: 15px; width: 33%" | [[File:Helm of Light.gif]] |
||
| + | | style="padding: 15px; width: 33%" | [[File:Shield of Light.gif]] |
||
| + | | style="padding: 15px; width: 33%" | [[File:Sword of Light.gif]] |
||
| + | |- |
||
| + | ! [[Helm of Light]] |
||
| + | ! [[Shield of Light]] |
||
| + | ! [[Sword of Light]] |
||
| + | |} |
||
| + | * Shining Crystal Set: Meant for Power types, consists of a sword, shield, and hat. Pieces refine for AP. |
||
| + | {| style="border-collapse:collapse; width: 100%; text-align: center;" border="0" |
||
| + | ! colspan="3" style="background-color: #505050; color: #ffffff; font-size: x-large; padding: 15px;" | Shining Crystal Set |
||
| + | |- |
||
| + | | style="padding: 15px; width: 33%" | [[File:Shining Crystal Helmet.gif]] |
||
| + | | style="padding: 15px; width: 33%" | [[File:Shining Crystal Shield.gif]] |
||
| + | | style="padding: 15px; width: 33%" | [[File:Shining Crystal Sword.gif]] |
||
| + | |- |
||
| + | ! [[Shining Crystal Helmet]] |
||
| + | ! [[Shining Crystal Shield]] |
||
| + | ! [[Shining Crystal Sword]] |
||
| + | |} |
||
| + | * Tsunami Set: Meant for Lions and Hunter Lords, consists of a gun, hat, and cape. Gun refines for Gun AP. |
||
| + | {| style="border-collapse:collapse; width: 100%; text-align: center;" border="0" |
||
| + | ! colspan="3" style="background-color: #505050; color: #ffffff; font-size: x-large; padding: 15px;" | Tsunami Set |
||
| + | |- |
||
| + | | style="padding: 15px; width: 33%" | [[File:Tsunami Helm.gif]] |
||
| + | | style="padding: 15px; width: 33%" | [[File:Tsunami Cape.gif]] |
||
| + | | style="padding: 15px; width: 33%" | [[File:Tsunami Rifle.gif]] |
||
| + | |- |
||
| + | ! [[Tsunami Helmet]] |
||
| + | ! [[Tsunami Cape]] |
||
| + | ! [[Tsunami Rifle]] |
||
| + | |} |
||
* Level 360--Inferno Cape |
* Level 360--Inferno Cape |
||
| − | ** The Inferno Cape is best cape you can get in the game until level 900. Exchange for it using 30x |
+ | ** The Inferno Cape is best cape you can get in the game until level 900. Exchange for it using 30x [[PandaTO Coupon D]] and 10x [[PandaTO Coupon C]] with the lower Pet Trainer Shara in Coral Town-Blooming Cora. |
| − | * Level 400--The Simple Set: |
+ | * Level 400--The Simple Set: |
| − | ** At level 400, the first set of PandaTO uniques become available. The Simple Set can be exchanged for at [https://pandato.fandom.com/wiki/Chaos_Tower Gate of Chaos Tower] for 50x [https://pandato.fandom.com/wiki/PandaTO_Coupon_E Panda Coupon E]'s (obtained from Requiem Apocrypha and through Key Quest rewards) and 30x |
+ | ** At level 400, the first set of PandaTO uniques become available. The Simple Set can be exchanged for with [https://pandato.fandom.com/wiki/Pet_Trainer_Shara_Exchange Pet Trainer Shara] at [https://pandato.fandom.com/wiki/Chaos_Tower Gate of Chaos Tower] for 50x [https://pandato.fandom.com/wiki/PandaTO_Coupon_E Panda Coupon E]'s (obtained from [[Sentinels #Requiem Apocrypha|Requiem Apocrypha]] and through [[Enhanced Quests|Key Quest rewards]]) and 30x [[PandaTO Coupon D]]. Doing the Key Quest should get you close to getting one piece of the set, which should help you become strong enough to grind and gather enough materials for the other pieces. |
| − | + | This set consists of: |
|
| + | {| style="border-collapse:collapse; width: 100%; text-align: center;" border="0" |
||
| − | **** Simple Helmet (required for level 400 set bonus) |
||
| + | ! colspan="9" style="background-color: #505050; color: #ffffff; font-size: x-large; padding: 15px;" | Level 400 Uniques (Simple Set) |
||
| − | **** Simple Shield (required for level 400 set bonus) |
||
| + | |- |
||
| − | **** Apocrypha's Demon Charm (sprint for all types) |
||
| + | | style="padding: 15px; width: 20%" | [[File:Simple Helmet icon.gif]] |
||
| − | **** Inferno Gun (weapon for gunners) |
||
| + | | style="padding: 15px; width: 20%" | [[File:Simple Shield icon.gif]] |
||
| − | **** Harbringer's Scythe (weapon for physical attackers) |
||
| + | | style="padding: 15px; width: 20%" | [[File:Harbinger's Scythe icon.gif]] |
||
| − | **** Harbringer's Dagger (weapon for Foxes and Cyber Lords--Exchange is located at lower Pet Trainer Shara in Coral Town-Blooming Cora) |
||
| + | | style="padding: 15px; width: 20%" | [[File:Harbinger's Dagger icon.gif]] |
||
| − | **** The Last Staff (weapon for magic types) |
||
| + | | style="padding: 15px; width: 20%" | [[File:The Last Staff icon.gif]] |
||
| − | **** GM Pet (pet for all types--exchanged for 50x Panda Coupon D's and 30x Panda Coupon C's, combines with Inferno Cape for set bonus) |
||
| + | |- |
||
| − | **** Simple Pendant (magic/sense accessory, dropped by Requiem Apocrypha or exchanged for with [https://pandato.fandom.com/wiki/Rosemary_%26_Miranda Rosemary]) |
||
| + | ! [[Simple Helmet]] |
||
| − | **** Simple Ring (power/charm accessory, dropped by Requiem Apocrypha or exchanged for with [https://pandato.fandom.com/wiki/Rosemary_%26_Miranda Rosemary]) |
||
| + | ! [[Simple Shield]] |
||
| + | ! [[Harbinger's Scythe]] |
||
| + | ! [[Harbinger's Dagger]] |
||
| + | ! [[The Last Staff]] |
||
| + | |- |
||
| + | | style="padding: 15px; width: 20%" | [[File:Inferno Gun Icon.gif]] |
||
| + | | style="padding: 15px; width: 20%" | [[File:Apocrypha's Demon Charm icon.gif]] |
||
| + | | style="padding: 15px; width: 20%" | [[File:GM Pet Icon.gif]] |
||
| + | | style="padding: 15px; width: 20%" | [[File:Simple Pendant icon.gif]] |
||
| + | | style="padding: 15px; width: 20%" | [[File:Simple Ring icon.gif]] |
||
| + | |- |
||
| + | ! [[Inferno Gun]] |
||
| + | ! [[Apocrypha's Demon Charm]] |
||
| + | ! [[GM Pet]] |
||
| + | ! [[Simple Pendant]] |
||
| + | ! [[Simple Ring]] |
||
| + | |} |
||
* Level 600--The Redemption Set |
* Level 600--The Redemption Set |
||
| − | ** After two rebirths, players reach the Redemption Set. These equips are |
+ | ** After two rebirths, players reach the Redemption Set. '''These equips are more powerful than their Simple Set counterparts, but if you already have the Simple Set, you can skip collecting this set and just hoard materials for the level 900 set, which uses the same exchange items.''' To exchange for these pieces, talk to GM_Slave in Megalopolis Square and provide 50x [[PandaTO Coupon E]], 30x [[PandaTO Coupon D]], 5x [[Golden Pig Statue]], 20x [[Silver Pig Statue]], and 60x [[Bronze Pig Statue]]. Pig statues are obtained by opening [https://pandato.fandom.com/wiki/Flashire_Snake_Box Flashire Snake Boxes] dropped by [[Sentinels #Flashire Snake|Flashire Snake]] at the top of [[Chaos Tower]], or obtained from [[Enhanced Quests|Key Quests]]. '''**IMPORTANT NOTE: Values on equipment cannot exceed 32627 or the stats will turn negative and be unusable. Be careful when refining the Redemption Shield and don't get above this number in total stats**''' As of April 2020, set bonus can be achieved solely using the helmet. |
| − | + | The set consists of the following: |
|
| + | {| style="border-collapse:collapse; width: 100%; text-align: center;" border="0" |
||
| − | **** Redemption Shield (required for level 600 set bonus--'''**IMPORTANT NOTE: Values on equipment cannot exceed 32627 or the stats will turn negative and be unusable. Be careful when refining the Redemption Shield and don't get above this number in total stats**''') |
||
| + | ! colspan="9" style="background-color: #505050; color: #ffffff; font-size: x-large; padding: 15px;" | Level 600 Uniques (Redemption Set) |
||
| − | **** Redemption Helmet (required for level 600 set bonus) |
||
| + | |- |
||
| − | **** Redemption Sword (weapon for physical attackers) |
||
| + | | style="padding: 15px; width: 20%" | [[File:Redemption Helmet icon.gif]] |
||
| − | **** Redemption Gun (weapon for gunners) |
||
| + | | style="padding: 15px; width: 20%" | [[File:Redemption Shield icon.gif]] |
||
| − | **** Redemption Staff (weapon for mages) |
||
| + | | style="padding: 15px; width: 20%" | [[File:Redemption Sword icon.gif]] |
||
| + | | style="padding: 15px; width: 20%" | [[File:Redemption Staff icon.gif]] |
||
| + | | style="padding: 15px; width: 20%" | [[File:Redemption Gun icon.gif]] |
||
| + | |- |
||
| + | ! [[Redemption Helmet]] |
||
| + | ! [[Redemption Shield]] |
||
| + | ! [[Redemption Sword]] |
||
| + | ! [[Redemption Staff]] |
||
| + | ! [[Redemption Gun]] |
||
| + | |} |
||
| + | |||
| + | == '''Requiem Apocrypha''' == |
||
| + | [[File:Requiem Harbinger.jpg|thumb|244x244px]] |
||
| + | [[Sentinels #Requiem Apocrypha|Requiem Apocrypha]] can be found in the once-forbidden Witch's Dungeon in Laplanoel. Taking that portal will warp you to an unused map in PandaTO, a long-forgotten tutorial map. Requiem Apocrypha will spawn after a brief delay and you will have to take him down. He drops items such as Hardant Box 270s, [[Lv. Up Gift Box|Level Up Gift Boxes]], Star Card No. 99 Drop, [[Simple Ring]], [[Simple Pendant]], and more. The main prize Requiem Apocrypha offers is [[PandaTO Coupon E]]. This is essential for grinding for the Simple Set and beyond. He can be difficult at first, but once you obtain even once piece of the Simple Set, he will become far easier. |
||
| + | |||
| + | There is no portal to exit the map. To exit, you must teleport out. Examples of ways you can do this are using the Snow Wing Portal purchased in Laplanoel Shopping Mall, a Portable Port AD purchased from Item Girl in Megalopolis Shop, marrying an alternate character and using the marriage teleport system, or simply relogging. The Snow Port Wing is the easiest way to exit the map, and will teleport you right back to Laplanoel. |
||
| + | |||
| + | == '''Guardians, Mind's Eye, and Harkon Defense''' == |
||
| + | [[File:Star Gazer Stella.png|thumb|288x288px]] |
||
| + | Guardians are useful aids which can help new players defeat difficult bosses. They're typically used for their debuffs, as they hit 100% of the time. One skill which is crucial for any non-Magic type character is Shield Breaker, the Lion 2nd job skill. Bosses like [[Sentinels #Requiem Apocrypha|Requiem Apocrypha]] and [[Sentinels #Flashire Snake|Flashire Snake]] have over 100% physical resistance in their final health bars, so a guardian using Shield Breaker allows non-Magic characters to actually defeat these bosses. |
||
| + | |||
| + | A Guardian/Enlightenment guide can be found [https://pandato.fandom.com/wiki/Almora's_Guide here.] If you need Shield Breaker on your guardian, aim for at least a 4 in sense. Lucky Fist is another useful skill for characters who cannot OHKO bosses, it deals 10% of the target's max HP as damage. To equip these skills to your guardian, equip Cochma's Rune to it, which can be obtained at GM Slave in Megalopolis Square. |
||
| + | |||
| + | One aspect of Trickster with PandaTO explores more than any other server is Harkon Defense. Staff members will announce there is an event being held and players can come join the raid. Many players attend these gatherings, and they're lots of fun for all. Players who come receive participation prizes, in the form of Harkon Tickets. Accumulate enough of them and exchange them for a special box with a chibi harkon boss pet. Click [https://pandato.fandom.com/wiki/Harkon_Protector here] for more information on Harkon Defense. |
||
| + | |||
| + | Once you get Mind's Eye, you can see the shadow world. This is important because Shaman Girl Jia offers daily monster quests which reward 30x [[Lv. Up Gift Box]] each, meaning players can obtain up to 240 gift boxes a day if they complete all the quests. Shaman Girl Jia rewards players with Level Up Gift Boxes in the following regions: |
||
| + | * Blooming Cora |
||
| + | ** Location: Coral Town - Blooming Cora, near portal to Coral Beach Field 3. |
||
| + | |||
| + | * Desert Beach |
||
| + | ** Location: Beach Town - Paradise, West side of the Map, South of the portal to Desert Beach Field 4. |
||
| + | |||
| + | * Megalopolis |
||
| + | ** Location: Megalopolis Square, South side of the map, between Southwest and Southeast Forest. |
||
| + | |||
| + | * Caballa Relics |
||
| + | ** Location: Relics Town - Azteca, to the left of Fortune Teller. |
||
| + | |||
| + | * Oops wharf |
||
| + | ** Location: Oops Wharf Town, on the beach above Don Guivanni. |
||
| + | |||
| + | * Rose Garden |
||
| + | ** Location: Event Garden - Ceremonia, South of Happisto Stallone. |
||
| + | |||
| + | * Black Swamp |
||
| + | ** Location: Swamp Town - Carbigal, to the East of the Carbigal Shop. |
||
| + | |||
| + | * Snow Hill |
||
| + | ** Location: Laplanoel, on the West Side of the Map, by the Witch's Dungeon. |
||
| + | Techichi Volcano, Tapasco Volcano, and the Abyss offer different rewards for their monster quests. At level 400, you can do the Techichi Volcano monster quest, which gives 3x Mad Ray Brooms. [[Raid Bosses #Mad Ray|Mad Ray]] is a raid boss monster intended for party play. He drops a box which gives out either 2x 1 Million Galder Checks, 3x [[PandaTO Coupon E]], or 1x [[Golden Pig Statue]]. You have the option of trying to find other players to help take him down, or selling the brooms to other players. |
||
| + | |||
| + | == '''Events''' == |
||
| + | PandaTO prides itself on its active community, and promotes collaborative play through things like staff-run events. These range from O/X Quizzes, Hide and Seek, Fast Trivia, and more. As you read above, players receive participation prizes for coming to these events, and give even better prizes to winners. These help new players obtain rare and expensive items to help them start their journey through the game. |
||
| + | |||
| + | The server also runs seasonal events, usually done through completing a monster quest and receiving a ticket to exchange for a box at GM Slave. Check #trickster-devlog on Discord to see if there's one active. |
||
| + | |||
| + | Click [https://pandato.fandom.com/wiki/Official_Events here] for more information about staff-run events and ongoing events. |
||
== '''Rebirth''' == |
== '''Rebirth''' == |
||
Gameplay in PandaTO is centered around the Rebirth system. When a player hits level 400, by paying a certain amount of galders, they will revert back to level 1, having all quests and stats reset too. Once a player hits level 400 again, they can increase their level cap by 100. This allows players to access new areas, new equipment, new quests, and new bosses. See the [https://pandato.fandom.com/wiki/Rebirth rebirth page] for more information and other frequently asked questions. |
Gameplay in PandaTO is centered around the Rebirth system. When a player hits level 400, by paying a certain amount of galders, they will revert back to level 1, having all quests and stats reset too. Once a player hits level 400 again, they can increase their level cap by 100. This allows players to access new areas, new equipment, new quests, and new bosses. See the [https://pandato.fandom.com/wiki/Rebirth rebirth page] for more information and other frequently asked questions. |
||
| + | |||
| + | Rebirth also gives access to further equipment which can be found here: [[PandaTO Endgame Unique Equipment]] |
||
{| style="border-collapse: collapse; margin:auto;" width="100%" cellspacing="0" cellpadding="5" border="0" |
{| style="border-collapse: collapse; margin:auto;" width="100%" cellspacing="0" cellpadding="5" border="0" |
||
|- style="background-color: #f2f2f2" |
|- style="background-color: #f2f2f2" |
||
Revision as of 18:52, 30 June 2020
PandaTO is a custom server, be sure to read through our Customizations page and other pages on this wiki and familiarize yourself with them. This guide is intended to help you through the changes and guide you through from levels 1-600.
Quest rewards have been enhanced, see Enhanced Quests. Make sure to check your ingame System Mail as these have also been revamped. Sell the extra Ears and Tails from the Level 30 mail to Item Girl. This will give you enough galders to buy Skill Cards from your Skill NPC.
Skill NPCs are located in Paradise, Azteca and Garden of Skill Master.
Character Selection

Selecting a character on a new server can be tricky, especially when considering the amount


of customization that PandaTO has. We've spent quite a bit of time trying to balance the classes and boost their power. This is something which is actively being worked on and high level community members are regularly consulted on. Lots of people ask what character is the best or that they should start out with. Truthfully, all classes have some level of viability, and once you get to level 900 and can start acquiring Avatar Skills, the playing field levels substantially.
Good beginner's characters include Buffalo (Gladiator), Sheep (Soul Master), Lion (Scientist), and Dragon (Dark Lord). All four of these characters/jobs have a good balance of farming and bossing capabilities (Sheep moreso after level 900 when they can acquire Flaming Fist). Champions, the Bunny Pure path, is considered the best character in the game but lacks a good AoEs for farming. This server lets them learn Inferno Blade, now called Champion's Blade, but is meant to be weak to compensate for their awesome bossing abilities (Flaming Fist/Tetra Punch). They are weaker as a beginner's character until you reach level 900 and can learn powerful AoE abilities through Avataring, and if you can get over the hurdle of the slower farming pace early on, it will be very easy afterwards.
Leveling up guide
Levels 1-400 in PandaTO are intended to be a quick grind compared to other versions of Trickster. You will find it easier thanks to the 8x EXP and TM EXP rates and lowered EXP requirements to level up. The first grind to 400 can be the hardest. Subsequent grinds will be easier thanks to the special booster and sprint provided to your character upon rebirth. This section is intended to help first time players find appropriate grinding spots for all levels. Note: Questing is sometimes easier for players starting out in early levels, but will eventually find grinding in Phantom School Room 1-2 or doing the Tapasco Volcano Mine Party Quest easier.
- Level 1-30--Episode 0, Chapter 1 story quests in Blooming Cora
- Levels 30-40--Hula Octopus and Grumpy Octopus, Desert Beach quests
- Levels 40-60--Caballa Relics Field 4.
- Level 60- 2nd Job Advancement Quest
- Level 60-100--Phantom School Room 1-4
- Levels 100-140--Path to Black Swamp/Snow Hill 1-Merry Christmas.
- Level 140--3rd Job Advancement Quests (You will receive a Ticket of the Valiant in the System Mail Rewards at level 140)
- Level 130-400-- Phantom School Room 1-2.
- Alternate: Level 260-400-- Tapasco Volcano Mine Party Quest.
Helpful Exchanges
There are a few helpful exchange NPCs throughout the game to help you get essential items. Make sure to collect any ![]() Crystal you find along the way, these are important early game because they are used in the Miranda Watty Exchange to receive Myshop items such as Flicker Drills. Crystals are a common item when drilling in Coral Beach and Desert Beach fields. Also see the Pet Trainer Shara exchanges for equips as you get closer to level 400. GM Slave is another useful exchange, see that exchange list here.
Crystal you find along the way, these are important early game because they are used in the Miranda Watty Exchange to receive Myshop items such as Flicker Drills. Crystals are a common item when drilling in Coral Beach and Desert Beach fields. Also see the Pet Trainer Shara exchanges for equips as you get closer to level 400. GM Slave is another useful exchange, see that exchange list here.
Job Advancement
Job Advancement is an essential part of any player's experience in Trickster. On PandaTO, the job advancement quests work the same, see 2nd Job and 3rd Job for the quest's requirements and order.
Each class has two options: a pure path and a hybrid path (Dragon even has three due to its light/dark spells). The Pure path job lets you learn skills exclusive to that class (although you can still learn them as Avatar skills) and the Hybrid path lets you learn skills your type's counterpart's 2nd job learns. For example, a Buffalo advancing to Gladiator (Pure) will let them have access to a whole new set of skills reserved for Gladiators, while advancing to Mercenary (Hybrid) will let them learn Bunny's 2nd job skills.
Many players ask what 3rd Job they should advance to. Typically on PandaTO, people choose the pure path due to the availability of Avatar skills. There aren't too many classes where the hybrid path is better, since almost every character has character-defining skills in their pure path option. The only exception to this may be if you're playing a gunner Fox, you would want to advance to Hunter Lord (Hybrid) to learn gun skills.
Farming Galders
Farming galders is the main way to measure progression in PandaTO, and is incredibly important when working towards rebirths. All the methods on how to farm Galders can be found on this page: Galder Farming
Boss Hunting


.gif)
In PandaTO, classic boss monsters roam the fields instead of hiding in dungeons. This, combined with a 4x chance to get a boss unique, means that their equipment is available to players who want it. These equips can make a player's grind to level 400 so much easier. Not all bosses are in the game at once, they rotate on a weekly/biweekly schedule. Check #trickster-devlog and look at the recent patches to find out what the newest rotation is. Typically, this is where you will find each boss:
- Tutankhamen: Desert Beach
- Tombeth: Caballa Relics
- Captain Skull: Mermaid Palace
- Pirate King Karan: Mermaid Palace
- Count Blood: Rose Garden
- Tenter Lion: Rose Garden
- Queen Odinea: Snow Hill
- Soki: Snow Hill
- Spicy Dragon: Tapasco Volcano
As you can see, bosses which rotate replace another boss in that respective region. Captain Skull and Pirate King Karan both inhabit Mermaid Palace, but never at a same time. Count Blood and Tenter Lion both roam around the fields of Rose Garden, but never at the same time.
Another one of PandaTO's unique features is the monthly boss hunting event. At the beginning of every month, boss seals will be reset and players will have the opportunity to race to the top of the leader boards and claim the top spots. The top five players with the most seals in any boss monster will receive a prize. These range from donation money prizes to PandaTO Coupon Ds. The latest prize list can be found on Discord under #announcements, and the rankings can be found here.
Chaos Tower

PandaTO's Chaos Tower is accessed through Don Guivanni in Coral Town - Blooming Cora. This is where you will can farm for PandaTO exchange coupons used for obtaining powerful equipment. Find more information here.
Compound Stones, Drills, and Refine items


Cash versions of these items were extremely valuable in past versions of Trickster, but are given for free to players on PandaTO.
- Compound Stones
- Level 50-245 Magic Compounding Stones can be drilled in various maps of the island, while level 260-305 can be received from doing Monster Quests in Tapasco Volcano and Abyss and exchanging the tickets received with Mint in that area (for Abyss, see the Mint in Aquarius Shop). Stones level 320 and 335 are received from bags dropped by Poppuri Dungeon Monsters. There are no stones in-game between 335 and 395. For more information, see Magic Stones. For level 395 and 900 stones, see Star Gazer Stella's Exchange.
- Drills:
- Flicker Drill can be found in-game from Miranda Watty's Exchange in Megalopolis Square in exchange for 1x Crystals and 500k Galders. Other MyShop drills can be found on our website. See more information on the Drills page. The best drills are Flicker Drill and Bat Drill, due to the increased TM experience your character gets from successfully drilling up an item when using one of those two.
- Refine items:
- The ores in-game and the % rates on refines are the same as other servers. While this server does not offer Refine % increasing fortune cards, we offer refine-enhancing items in the Refinement Event Box dropped by all classic bosses except Captain Skull and Spicy Dragon. We also offer a unique refine enhancement item, Anvil Stone which increases the chance for a successful refine by 50%. These can be received from Enhanced Quests and Refinement Event Box.
Equipment
Due to the abnormal level curve in PandaTO, many pieces of equipment that players know are good are not usable for a majority of the game. This guide is intended to help players learn what equips they should try to get. See a video guide presented by Moderator Holo(Alekx) here.
- Levels 1-299:
- Use whatever the best equipment you can get your hands on for your particular level, whether it's the requiem spire set (obtained via system mail rewards), boss uniques, or a powerful phantom unique picked up in the Fiesta Zone or Phantom School 1-1. These levels go by quickly, so do not worry about it. As long as you get good enough equipment to kill mobs in Fiesta Zone and Phantom School, it's good enough. For additional stats, go to Rosemary in Paradise, Megalopolis, or Carbigal Shop to exchange for head accessories (level 70/150), the PandaTO Cape, and Pandro/Pandro V2.
| Requiem Spire Set | ||||||||
|---|---|---|---|---|---|---|---|---|
| Spire Circlet | Requiem Spire Shield | Immaterial Spire Sword | Spire Gun | Spirit Spire Ring | ||||
| Custom PandaTO Low Level Equipment | ||||||||
|---|---|---|---|---|---|---|---|---|
| Pandro | Pandro V2 | PandaTO Cape | ||||||
- Level 300--The Draconic Set:
- Work on getting the Draconic Set, Spicy Dragon's unique equipment, at level 300, this will help your grind if you were struggling before this. Open from Draconic Box. Weapons and hats are extremely common, often players will give it to you if they have spares but can be easily and cheaply purchased from other players. Shields and accessories are more rare, but not overly expensive to purchase from other players. If you easily hit level 360 without acquiring these equips, skip them and go straight to the Sentinel Equips.
| Draconic Set | ||||||||
|---|---|---|---|---|---|---|---|---|
| Draconic Sword | Draconic Staff | Draconic Bowgun | Draconic Dagger | Draconic Circlet | ||||
| Draconic Shield | Draconic Restraint Pendant |
|---|
- Level 320--Masks:
- Powerful masks can be obtained from the upper Pet Trainer Shara in Coral Town-Blooming Cora in exchange for 30x Panda Coupon A's and Panda Coupon B's obtained in Chaos Tower or from Key Quests. These masks can be refined for MD or DP.
- Tenter Lion Mask--For Power type users.
- Noble Monocle--For Magic type users.
- XT Goggles--For Sense type users.
- Jelly Fish Goggles--For Charm type users.
- Powerful masks can be obtained from the upper Pet Trainer Shara in Coral Town-Blooming Cora in exchange for 30x Panda Coupon A's and Panda Coupon B's obtained in Chaos Tower or from Key Quests. These masks can be refined for MD or DP.
- Level 330---Character Sets and Head Equipment:
- Character set boxes can be obtained from the upper Pet Trainer Shara in Coral Town-Blooming Cora in exchange for 2x PandaTO Coupon A.
- Head equipment is received from the lower Pet Trainer Shara in Coral Town-Blooming Cora for 30x PandaTO Coupon B and 30x PandaTO Coupon C. These pieces are refined for DP.
- Briar Rose--For Power type users.
- Sweet Hibiscus--For Magic type users.
- Sunshine Daisy--For Sense type users.
- Buttery Tulip--For Charm type users.
- Level 360--The Sentinel Sets:
- At level 360, players can wear Sentinel Equipment. These sets are intended to give players a large boost in damage, but sacrifice durability, giving little HP and no DP. These sets can help you get through the early stages of the game and defeat Requiem Apocrypha. There are five sentinel sets, meant for each class and type of character:
- Fallen Watcher Set: Meant for Magic Types, consists of a staff, shield, and hat. Pieces refine for MA.
| Fallen Watcher Set | ||
|---|---|---|
| Fallen Watcher Helm | Fallen Watcher Shield | Fallen Watcher Staff |
- Solar Set: Meant for Charm types, consists of a sword, shield, and hat. Pieces refine for HV.
| Solar Set | ||
|---|---|---|
| Solar Helmet | Solar Shield | Solar Sword |
- Light Set: Meant for Foxes and Cyber Hunters, consists of a dagger, shield, and hat. Pieces refine for DA.
| Light Set | ||
|---|---|---|
| Helm of Light | Shield of Light | Sword of Light |
- Shining Crystal Set: Meant for Power types, consists of a sword, shield, and hat. Pieces refine for AP.
| Shining Crystal Set | ||
|---|---|---|
| Shining Crystal Helmet | Shining Crystal Shield | Shining Crystal Sword |
- Tsunami Set: Meant for Lions and Hunter Lords, consists of a gun, hat, and cape. Gun refines for Gun AP.
| Tsunami Set | ||
|---|---|---|
| Tsunami Helmet | Tsunami Cape | Tsunami Rifle |
- Level 360--Inferno Cape
- The Inferno Cape is best cape you can get in the game until level 900. Exchange for it using 30x PandaTO Coupon D and 10x PandaTO Coupon C with the lower Pet Trainer Shara in Coral Town-Blooming Cora.
- Level 400--The Simple Set:
- At level 400, the first set of PandaTO uniques become available. The Simple Set can be exchanged for with Pet Trainer Shara at Gate of Chaos Tower for 50x Panda Coupon E's (obtained from Requiem Apocrypha and through Key Quest rewards) and 30x PandaTO Coupon D. Doing the Key Quest should get you close to getting one piece of the set, which should help you become strong enough to grind and gather enough materials for the other pieces.
This set consists of:
| Level 400 Uniques (Simple Set) | ||||||||
|---|---|---|---|---|---|---|---|---|
| Simple Helmet | Simple Shield | Harbinger's Scythe | Harbinger's Dagger | The Last Staff | ||||
| Inferno Gun | Apocrypha's Demon Charm | GM Pet | Simple Pendant | Simple Ring | ||||
- Level 600--The Redemption Set
- After two rebirths, players reach the Redemption Set. These equips are more powerful than their Simple Set counterparts, but if you already have the Simple Set, you can skip collecting this set and just hoard materials for the level 900 set, which uses the same exchange items. To exchange for these pieces, talk to GM_Slave in Megalopolis Square and provide 50x PandaTO Coupon E, 30x PandaTO Coupon D, 5x Golden Pig Statue, 20x Silver Pig Statue, and 60x Bronze Pig Statue. Pig statues are obtained by opening Flashire Snake Boxes dropped by Flashire Snake at the top of Chaos Tower, or obtained from Key Quests. **IMPORTANT NOTE: Values on equipment cannot exceed 32627 or the stats will turn negative and be unusable. Be careful when refining the Redemption Shield and don't get above this number in total stats** As of April 2020, set bonus can be achieved solely using the helmet.
The set consists of the following:
| Level 600 Uniques (Redemption Set) | ||||||||
|---|---|---|---|---|---|---|---|---|
| Redemption Helmet | Redemption Shield | Redemption Sword | Redemption Staff | Redemption Gun | ||||
Requiem Apocrypha

Requiem Apocrypha can be found in the once-forbidden Witch's Dungeon in Laplanoel. Taking that portal will warp you to an unused map in PandaTO, a long-forgotten tutorial map. Requiem Apocrypha will spawn after a brief delay and you will have to take him down. He drops items such as Hardant Box 270s, Level Up Gift Boxes, Star Card No. 99 Drop, Simple Ring, Simple Pendant, and more. The main prize Requiem Apocrypha offers is PandaTO Coupon E. This is essential for grinding for the Simple Set and beyond. He can be difficult at first, but once you obtain even once piece of the Simple Set, he will become far easier.
There is no portal to exit the map. To exit, you must teleport out. Examples of ways you can do this are using the Snow Wing Portal purchased in Laplanoel Shopping Mall, a Portable Port AD purchased from Item Girl in Megalopolis Shop, marrying an alternate character and using the marriage teleport system, or simply relogging. The Snow Port Wing is the easiest way to exit the map, and will teleport you right back to Laplanoel.
Guardians, Mind's Eye, and Harkon Defense


Guardians are useful aids which can help new players defeat difficult bosses. They're typically used for their debuffs, as they hit 100% of the time. One skill which is crucial for any non-Magic type character is Shield Breaker, the Lion 2nd job skill. Bosses like Requiem Apocrypha and Flashire Snake have over 100% physical resistance in their final health bars, so a guardian using Shield Breaker allows non-Magic characters to actually defeat these bosses.
A Guardian/Enlightenment guide can be found here. If you need Shield Breaker on your guardian, aim for at least a 4 in sense. Lucky Fist is another useful skill for characters who cannot OHKO bosses, it deals 10% of the target's max HP as damage. To equip these skills to your guardian, equip Cochma's Rune to it, which can be obtained at GM Slave in Megalopolis Square.
One aspect of Trickster with PandaTO explores more than any other server is Harkon Defense. Staff members will announce there is an event being held and players can come join the raid. Many players attend these gatherings, and they're lots of fun for all. Players who come receive participation prizes, in the form of Harkon Tickets. Accumulate enough of them and exchange them for a special box with a chibi harkon boss pet. Click here for more information on Harkon Defense.
Once you get Mind's Eye, you can see the shadow world. This is important because Shaman Girl Jia offers daily monster quests which reward 30x Lv. Up Gift Box each, meaning players can obtain up to 240 gift boxes a day if they complete all the quests. Shaman Girl Jia rewards players with Level Up Gift Boxes in the following regions:
- Blooming Cora
- Location: Coral Town - Blooming Cora, near portal to Coral Beach Field 3.
- Desert Beach
- Location: Beach Town - Paradise, West side of the Map, South of the portal to Desert Beach Field 4.
- Megalopolis
- Location: Megalopolis Square, South side of the map, between Southwest and Southeast Forest.
- Caballa Relics
- Location: Relics Town - Azteca, to the left of Fortune Teller.
- Oops wharf
- Location: Oops Wharf Town, on the beach above Don Guivanni.
- Rose Garden
- Location: Event Garden - Ceremonia, South of Happisto Stallone.
- Black Swamp
- Location: Swamp Town - Carbigal, to the East of the Carbigal Shop.
- Snow Hill
- Location: Laplanoel, on the West Side of the Map, by the Witch's Dungeon.
Techichi Volcano, Tapasco Volcano, and the Abyss offer different rewards for their monster quests. At level 400, you can do the Techichi Volcano monster quest, which gives 3x Mad Ray Brooms. Mad Ray is a raid boss monster intended for party play. He drops a box which gives out either 2x 1 Million Galder Checks, 3x PandaTO Coupon E, or 1x Golden Pig Statue. You have the option of trying to find other players to help take him down, or selling the brooms to other players.
Events
PandaTO prides itself on its active community, and promotes collaborative play through things like staff-run events. These range from O/X Quizzes, Hide and Seek, Fast Trivia, and more. As you read above, players receive participation prizes for coming to these events, and give even better prizes to winners. These help new players obtain rare and expensive items to help them start their journey through the game.
The server also runs seasonal events, usually done through completing a monster quest and receiving a ticket to exchange for a box at GM Slave. Check #trickster-devlog on Discord to see if there's one active.
Click here for more information about staff-run events and ongoing events.
Rebirth
Gameplay in PandaTO is centered around the Rebirth system. When a player hits level 400, by paying a certain amount of galders, they will revert back to level 1, having all quests and stats reset too. Once a player hits level 400 again, they can increase their level cap by 100. This allows players to access new areas, new equipment, new quests, and new bosses. See the rebirth page for more information and other frequently asked questions.
Rebirth also gives access to further equipment which can be found here: PandaTO Endgame Unique Equipment